Sometimes you have a thing that you have to machine on all of its sides. Here’s an example of how I used minimal cradles to such a thing!
This is a close cousin of the soft-jaw method, but it relies on a small quantity of 5-minute epoxy to hold the workpiece down. For a more production oriented process, a vacuum fixture or an actual vise with a soft jaw set could be used. Here I was making only one and wanted to waste as little time on tooling as possible. It worked great!
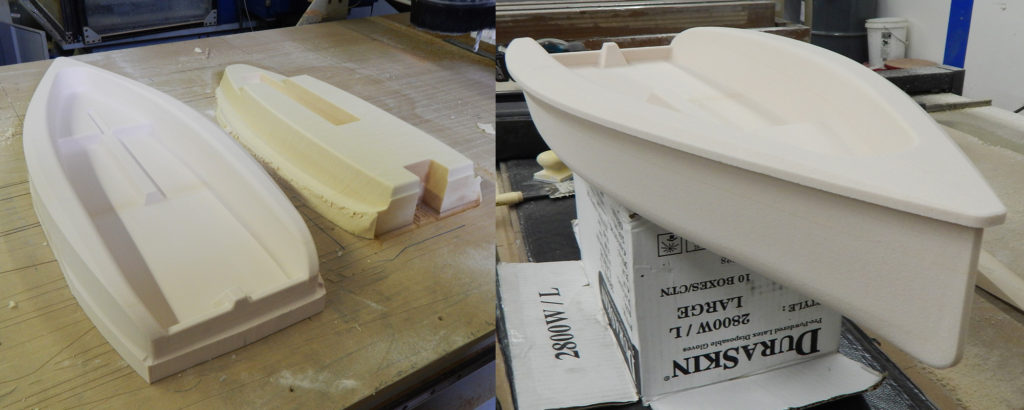
This is a mold plant made of 40 pound per cubic foot urethane tooling board (SikaBlock M600) that needed to be machined all over to mold a recess for the keel of a sailboat. I machined this in three setups using scraps of the same tooling board to fixture the part for each operation.
The first step was to model the whole thing. I used Rhino3D for the modeling and MadCAM for the toolpaths. Each setup (cradle and cut on the part) was done with the same work offset. Key to getting this first flip to work was the use of a tight fitting cradle machined from the tooling board – but only in the corners of the part. This way I saved on cradle material and also had good visibility to make sure the part was precisely located in the cradle before machining the second and third operation.
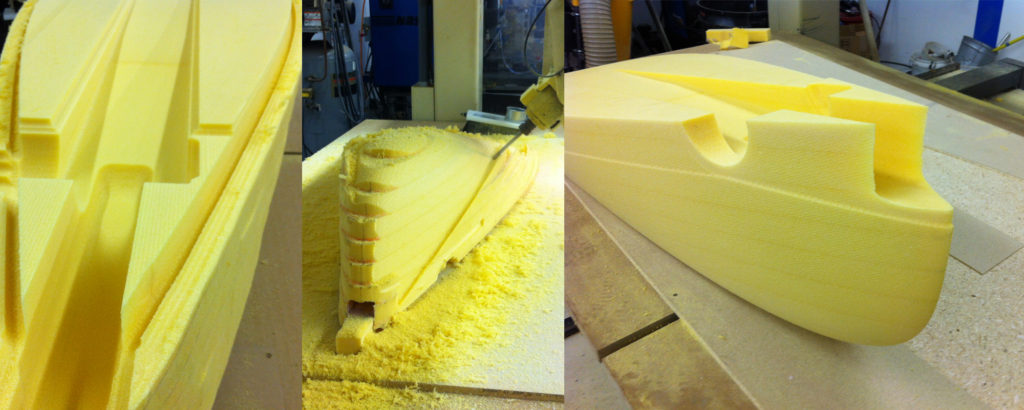
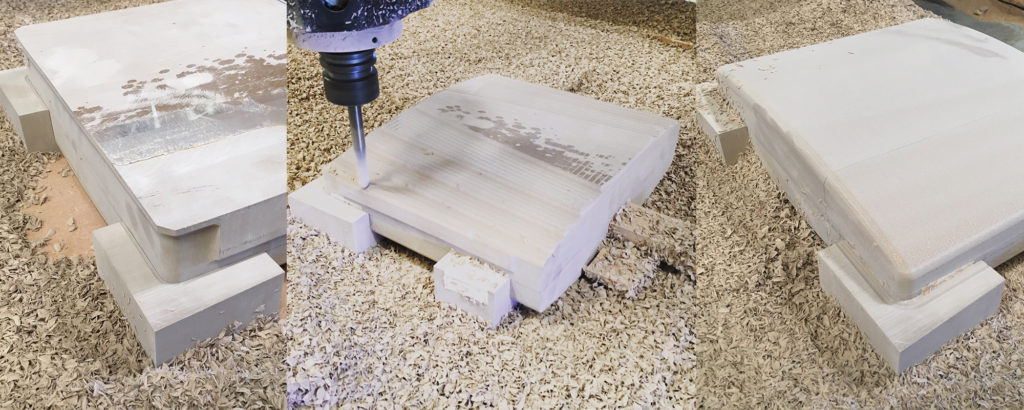
Here’s the first operation roughed and the finished first operation with machined cradles for the second:
With the cradles machined for the part to get flipped into, it was easy to know exactly where the part is at. I kept the same work offset for each combination of cradle and finish cut. In the 3D model, I turned on the layer with the part in the cradle and was ready to do the CAM work for operation number two. I have found that with high density board like this a tolerance of 0.002” to 0.005” is plenty. To make this offset, I used a negative number in the “stock to leave” setting in the CAM software. You could very easily offset the model by the desired gap and use it to cut the cradle with a solid modeling operation.
To hold the part into the cradle, I used a small amount of 5 minute epoxy on the top edge of each block where I could remove it easily with a razor knife. On the bottom of the part, I used some MDF blocks and more 5 minute epoxy to hold the part in the cradle. Here I knew I would machine that area so could afford to really goop it up with 5-minute – see middle image below.
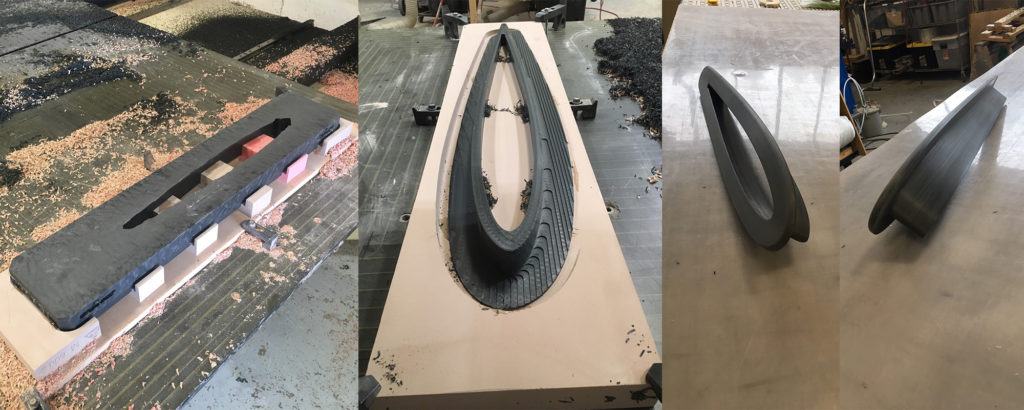
Now that five of the six sides are machined, I have to find a way to hold this up vertical to machine the bottom socket. Arguably this could have been the first operation with the sides done second, but I didn’t do it that way. The part is tapered so the socket to hold it the other way around would have needed to be split. Anyway, I did it like this:
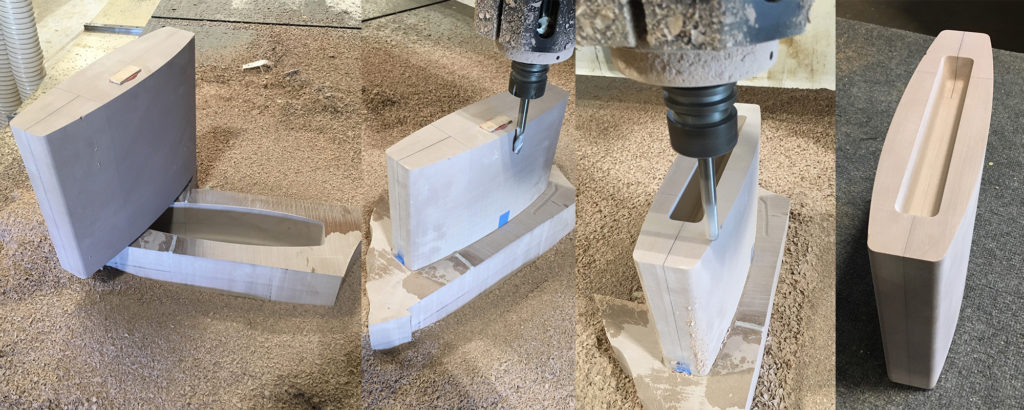
Now this got a little dicey. There’s not much of that part in the cradle for the third operation and the fit wasn’t as tight as I wanted – see the blue tape placed on the cradle to tighten things up. To check the location of the part, I used the 1/2” bit placed with it’s center 1/4” from where the edge of the part should be. By tapping the part until it just touched, I was able to locate things side to side. It’s no probe but it works! Once it looked good, I put some 5 minute epoxy on the areas where the tape could keep it from sticking to the part, but where it would chock the fit. I took gentle cuts and it worked out great! My caliper said the slot was within 0.005” of the center of the bottom of the part. For a real machinist this would be rough as, but for my purposes here it was great!
And the whole thing was done by quitting time!
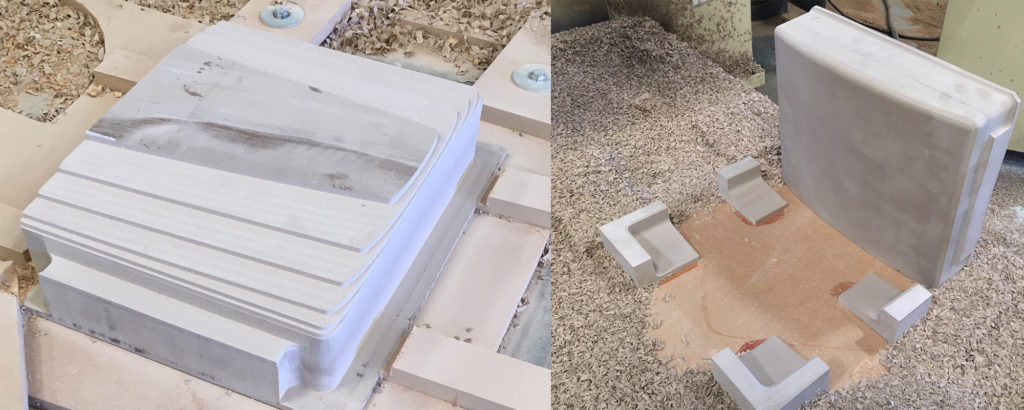
More Examples:
I have used the same cradle method many times for machining all kinds of materials on the routers. Because low density materials produce less cutting force than metals, you can get away with a lot more! Here are some examples of me getting away with stuff: