Resins are glue. If you are laminating a part, you have to keep the resin (glue) from sticking your part to the mold. You need a mold release system. A “release system” is a combination of surface preparation, coating application process and a release agent. There are five main categories of release agents:
- Wax
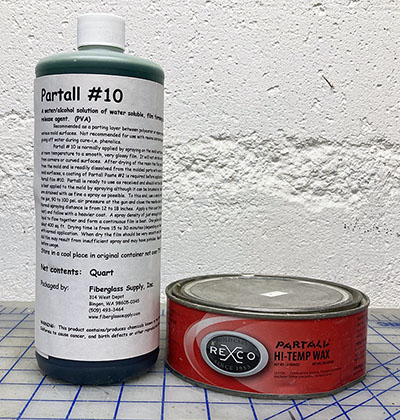
- PVA – Polyvinyl Alcohol
- Polymer Release Systems
- Semi-permanent Release Systems
- Release films
There are two ways to adhere one thing to another: mechanical and chemical. These are what we need to prevent in order to release a part! Mechanical adhesion is based on surface texture and surface-energy. Chemical adhesion is when one thing bonds to another on a molecular level through reactivity leading to chemical bonds. Prevent the mechanical bonds by creating as smooth a surface as possible. Fill any porosity with wax or polymer sealers, leaving a shiny surface with nothing to “grab” onto. A release coating will leave a surface with very low surface energy, further limiting and potential mechanical adhesion. Prevent chemical bonds by ensuring that the mold surface is as chemically inert as possible. It also helps to have an impermeable physical barrier – even if it is a very thin one!
Overview
With a wax, polymer or a semi-permanent release system, the goal is to reduce the surface energy of your mold surface so that your part won’t stick. It is typical to apply several coats. This serves to build up a sufficient film thickness, but more importantly it decreases the risk of missed spots. There is a degree of porosity to these coatings, and the coatings are extremely thin. The goal is to apply a consistent coating that doesn’t have ANY gaps – because it only takes a few square inches/centimeters to stick a part.
PVA and release films go the “full barrier” route. PVA creates a film that physically separates the part from the mold. It is thicker than other applied release agents and can impact surface finish of your parts if not applied carefully. Release films are like stickers that you apply to your mold surface. The surface of the sticker is a Teflon or polymer film with a very low surface energy – like the surface of a non-stick frying pan.
Surface Preparation
A big part of the success of a mold release system comes down to the surface material and level of finish. Some rules of thumb: smoother is better, chemically inert is critical, and clean is key.
You’d sand or grind a surface you want to bond with adhesives because all the little scratches increase the exposed surface area. They also give lots of small feature for an adhesive to “key into.” With a mold surface, we don’t want either of those things to happen! The smoother the finish you can get on your mold surface, the better your release will work. Practically, a surface sanded to 220 or 320 grit is a minimum for a safe release – but a finer finish is usually better. As you work up through sanding grits even more, you will be removing large scratches in the surface and replacing them with small ones. Buffing takes this even further – until the scratches are so tiny you can’t see them.
Release properties
Slip
The level of “slip” of a release agent indicates how easily a part will pull off the surface. “High slip” is very easy to release, “low slip” won’t want to come apart so easily – but it will still release. Don’t assume that the highest slip is the best for your application. It can be very easy to pre-release gelcoats or skincoats with a release that is too slippery. This is a situation where technical sales advice is very useful – there are just so many choices!
Transfer
When the release agent comes off with the part – that’s “transfer.” It can be a big problem when you need to stick stuff to a part after demolding – like paint or secondary bonding. Some release systems transfer readily and require part cleaning after demolding. Others are designed specifically not to transfer.
Service Temperature
If you need high temperature, you have some options. Most waxes are available in a “High Temp.” version, but that really means 180F/80C or less. For prepregs, you’ll want either release film, polymer release rated for the temperature or a semi-permanent release. If you’re doing this kind of work, take the time to talk with a technical sales agent for your release system and make sure you’re using the right thing.
Wax
Paste wax is an old standby – and in a lot of situations it works great. In general, wax has a moderate level of slip, so it can be good in situations where you don’t want the part just jumping off the mold surface. Building new molds is a great place to use wax. When spraying tooling gelcoat on a plug and then building up the skincoat and many layers of mold laminate, having a lower slip surface prevents pre-release and still allows for a glossy surface.
Many of the best paste waxes are actually waxes with a slippery polymer additive like PTFE (aka Teflon) or silicone. This is designed not to transfer – but be careful. Also waxes with additives can be hard to tape off for gelcoat masking – see “Tape Test” below. Some people like straight Carnauba wax or a “high carnauba” mix because it gives good gloss and filling of porosity – and usually you can mask to it.
Wax Application
Wax should go on in small (2’x2’ / 500mm x 500mm or so) patches with a clean rag. The wax goes on thick enough to cover, and then needs to be “buffed” back off to leave a haze-free and smear-free surface. Think “wax on, wax off.” If you work too large an area, the wax will start to harden and will be difficult to buff back off. It is a good idea to apply several coats of wax with at least 15 minutes between them. The thickness of the coating will not increase much with each additional coat, but the risk of missed spots will be less. The consistency of the coating will improve too.
There are also liquid wax products that are thinner and more runny. These are generally used for faster application with molds that have already had conditioning with paste wax. For products where surface finish is not as important, liquid wax or “slurry wax” can be applied faster and can reduce buildup on textured or rough surfaces. Generally, for prototyping it isn’t as useful as other release options, and for production you’re better off with a semipermanent polymer release.
Wax Drawbacks
Downsides of wax include the potential for transfer – where the release agent comes off with the part. This can be problematic for parts that have post-finishing or bonding because the wax has to be cleaned off. Another big downside is the amount of work it takes to do wax well at scale. The labor is just going to be more to apply and polish out a coat of paste wax than it will be to apply a coat of semipermanent release now and then. Wax will also build up on mold surfaces over time and require “stripping.” Stripping is the tedious process of removing all the release agent and re-building it once it gets too thick and hazy to make pretty parts.
Wax Tips:
- Use wax that is designed for mold release.
- Avoid wax with anything you plan to heat up – like prepregs or parts that will be require post-curing in the mold.
- When in doubt use “high temperature” wax – I never use anything else if there’s a choice.
- Read the application guide from the manufacturer and do what they say!
- You might put PVA over wax, but don’t try to put wax over PVA! Also don’t mix wax with polymer release systems.
PVA – Polyvinyl Alcohol
PVA is a liquid that you spray or brush onto a mold to create a glove-like barrier between the mold and a part. It is good for increasing the reliability of release on new molds and for parts where cosmetics aren’t critical. PVA is water soluble and can be peeled off as a film as long as the thickness is adequate.
To apply PVA, you really should spray it. A cup-style spray gun can be used to “dust” on thin coats that cure quickly followed by several wetter coats to build a consistent and not-runny film. Avoid a too-thin film too, it won’t work well and will be very hard to remove. You can brush it on if you don’t care about the surface finish. The PVA texture will show up on the part surface so any drips or sags will carry over onto your part.
Generally, PVA is used to solve specific problems or to de-risk the use of new “green” molds. Because it forms an actual barrier, it will release in almost any situation as long as the barrier is maintained. While it works alone, PVA is often put over wax, but will sometimes pool up in places or fish-eye leaving an undesirable mold surface. Spraying can help solve these problems.
Often PVA will transfer to a part as a film, or as the remains of a film. Water cleans it off, and warm water and a Scotchbrite pad or shop towel work.
Polymer Release

A polymer release is a system that uses an evaporating liquid with a dissolved or emulsified polymer additive to deposit a low-surface-energy film on your tool surface. A solvent or water carrier evaporates after application, leaving behind a thin film of the super-slipper polymer. Water-based release agents smell better and are generally much safer to use. Some of these include PTFE (Teflon) and can be extremely slippery. Be wary of ones with silicone additives – they can be hard to clean off surfaces you plan to paint. I’m sure there’s a way, but it may not be worth the hassle.
Compared to a semi-permanent release, most polymer release systems have only one component. You apply them by spray or by wiping rag. It is possible to get a shiny surface with no loss of gloss, but often liquid polymer release agents are best for parts where finish isn’t critical, but a low-labor high-safety release is key.
There is a risk of transfer, because the release agent does not develop a strong bond to the mold surface. While you may be able to get multiple “pulls” from one application of release, it is not as reliable or robust as a semi-permanent release.
Semi-permanet Systems
Release systems that hold up to many molding cycles without re-application are “semi-permanent” systems. The system builds an adhered coating – like a paint – to your mold surface. You can re-apply a coat of release between parts, but in a production environment this is usually only done on a schedule or when parts get harder to pull. These are the industry standard for releasing composite parts and are found in most factories doing composites work. There are many brands and types, and are available in a range of “slip” levels.

Usually semi-permanent release systems come with several components. At a minimum, there will be a sealer and a release. The sealer goes on first and creates a bond to the tool surface, fills minor imperfections and builds some thickness. After several coats of sealer, the release goes on to create a smooth non-stick surface. With some systems the sealer is just a more highly-filled version of the release itself.
Semi-permanent releases are great! Transfer is minimal and because you apply more rarely, the buildup on the mold surface is less of a concern. For almost all production molding, this is the category of release they should be your first choice.
Application
Application hygiene is more critical with semi-permanent release systems than with wax or PVA. It is important to thoroughly clean new surfaces with “mold cleaner” – a nasty brew of things you shouldn’t breathe that removes all old release coats and contaminants from a surface. Follow the application instructions and wear the necessary protection.
Apply with clean rags or high quality fiber towels that come on a roll. It is good to use a single folded sheet of fiber towel as a rag and apply the release to the rag before wiping it on. Avoid pools of release on the part and don’t dump or squirt it onto the part surface and then rub it in. Usually these products are expensive! You want to maximize the amount that goes on the surface and minimize the amount that gets discarded on the rag.
Technical data sheets will tell you how many coats to apply and how much time to leave between them. Generally the rule of thumb is that three coats is the minimum to be sure-enough” that you have hit all the spots.
Storage and Handling
Many release systems react with water in the air to cure, so it is essential to keep containers well sealed. Avoid dispensing directly from large containers and decant into smaller jugs – ideally with flip caps. Avoid using spray bottles to dispense because they mix air through the contents with each squeeze. The air has moisture in it, and the moisture reduces the ability of the release liquid to cure into a film on the mold surface. Be mindful that many semi-permanent release components have a shelf life. They are reactive, and will become less and less able to do their job over time and with every opening of the jug. Be really careful with shelf life – I have definitely stuck stuff from using crusty old jugs of release!
Primer
Some release systems include a “primer” – which isn’t a release, but creates a smooth surface for applying the sealer. Mold primers go directly over smooth but porous surfaces like tooling board, epoxy-sealed MDF and gelcoat or primer that has been sanded or buffed. They’re expensive but very useful – especially for one-off direct tooling. Often a mold will require many coats of primer.
Release Films
For prototyping and one-offs it is hard to beat adhesive release films – especially if you’re in a hurry and don’t care too much about a perfect finish out of a mold. These films are just like a roll of Teflon sticker. You cut it out to shape, peel the backing and stick to your tool surface. It gets lapped and “wallpaper cut” in corners and joints. Compound curves are no fun, and you end up with little resin lines on your parts everywhere there is a joint in the film. The film surface is also very low surface energy – so things really don’t stick!
More Here: Adhesive Teflon – It’s Awesome.
Adhesive release films come in a variety of thicknesses and often have fabric substrates that keep the film stable. There are some that are porous and others that don’t let air through. Generally the porous ones work better.
These films typically come with either a silicone or acrylic adhesive. The acrylic is a one-time stick, but it’s way cheaper. Silicone adhesive comes off by peeling or with a razor blade. If you’re going to discard the tool after a few uses, acrylic is fine. If you want to maintain and patch the film surface, use silicone.
Also, packing tape – the shiny plastic tape used for sealing boxes – is a good choice if you’re in a hurry and want something cheap. It leaves little ridges where there are overlaps and it won’t be fun for big things – but the price is hard to beat. It can be a good idea to apply a coat or two of wax over. Some tapes seem to release more easily than others.
The “Tape Test”
You can use masking tape to determine if your surface is slippery. The “tape test” involves trying to stick some painter’s masking tape to a released surface and then trying to pull it off. If it comes off easily, your part probably will too. This isn’t science – but its quick and won’t damage the release coating. Plain wax will still allow tape to stick, but waxes with additives often won’t. Some high-slip release agents – especially water or solvent based PTFE ones – won’t even let the tape stick a little. Other lower slip release agents accept tape fine and will still release. Get to know your system!
Sealant Tape Problems
The tape test implies another challenge: that often things don’t stick. This makes masking a mold for gelcoat a real challenge! It can also be nearly impossible to stick vacuum bag sealant tape to well-released surfaces. Often it makes sense to mask off the perimeter of a mold where sealant tape will go before applying release. Only some low-slip release coatings will allow sealant tape to adequately stick to a mold surface – and it it a good idea to test this before releasing a tool! Sometimes heat makes things worse too – so that sealant tape that seemed ok at room temperature gets all un-stuck with heat in an oven or autoclave.
Problems
There are going to be problems. Release coats and their application are some of the most common areas where people struggle – especially people new to composites work. Here are some common problem areas:
“Green” Molds
Even with perfect application of a release, if your mold surface is still reactive, the chemicals can “reach through” the film of release agent and glue themselves together.
The most common instance where this happens is with new – or “green” – polyester or vinyl ester molds with gelcoat. Even in the best of circumstances, a cured resin will still have some reactive “free” styrene even after it is effectively cured. This can be enough to cause big problems. When you laminate the first part on that new mold, the new gelcoat can link up with those remaining bonding opportunities on the mold surface – and glue your part to your new mold.
The solution to this can be a post-cure (though not always), just waiting longer, or using PVA as a barrier. You also need to be sure that the resin in the mold itself is catalyzed enough (at a warm-enough temperature) for a full cure – testing the Barcol hardness is a good way to evaluate cure.
It is also a great idea to do a “peel coat” on new tooling – just spray gelcoat on a newly release-coated tool and peel it off by hand after it cures. It’s a lot easier to remove a skin of gelcoat than a stuck part – and the new gelcoat reacts with any free styrene in the mold surface. Once your peel coat comes off clean, you can be fairly confident that your part will too. Peel coats are also a good way to clean textured surfaces on a new mold – like non-skid molded deck textures on boats.
(Read “Why Molds Stick” by Bob Lacovara on the Rexco site.)
Sloppy Application
Applying release agents is boring. Often they dry or turn clear very fast and it is hard to know where you’ve been and where you haven’t. This can be a big problem, especially in manufacturing environments where people are in a hurry. It is often better to release large molds with a small team. Requiring more coats will take more labor, but will be a good safeguard against missed spots. Being as systematic as possible is always good!
“Rattle-can” primer
The spray-can primer from the hardware store will probably not work well for your plug or mold surface. It seems to cure incompletely and then either wipe off with solvent-based releases or react through wax. No idea really. If you know, please tell me! PVA and release film should work ok.
Epoxy primer
This one makes no sense to me but it happens. Epoxy primers often react poorly with some release systems and can cause part sticking. My only guess is that the epoxy is off-ratio or under-cured and this results in active chemical interaction with the part. As a boatbuilder, I have used Awlgrip 545 epoxy primer for one-off mold surfaces many times. It isn’t ideal because it smells and is expensive, but sometimes it is just the thing to bond to green epoxy coating on a wood plug. Not sure why, but it is often a source of problems. My preference is for something like Duratec polyester primer for plug surfaces instead.
Internal Mold Releases
If you are in a high-volume manufacturing environment, there is a kind of release that gets mixed with the resin instead of applied to the tooling surfaces. It is called “internal” mold release (IMR) and gets driven to the tool surfaces as the resin in the part cures. This is really only applicable to closed molding processes and is used with a semi-permanent release on the tooling too. I don’t know much about it. If you have experience, get in touch and share!
More Information:
Rexco: Bob Lacovara – Why Molds Stick
Throttle Stop Garage: PVA Application for Fiberglass Mold Making
Axel Plastics: Proper Use of Semi-permanent Mold Release
Composites World: Proper application of semi-permanent mold release systems