This page is a start to a big list of favorite hand and small power tools for composites work. I have to round up more things for pictures but this is a look into the toolbox. Please let me know if you have any favorites that should be here!
You’ll see lots of repeat-tools – ones that come in handy for a bunch of different things. This is great because once you have a basic toolkit, there are lots of processing options that are pretty approachable.
The Cutting Table
For pretty much any composites work you’re going to need a place to cut dry material, prepare vacuum-bagging stuff and trim and fit core sheets. This is usually a table. There are a few basic tools that will make this all easier…
Cutting Mat and Safety Ruler
A large work surface is great – and one covered with some kind of cutting mat is ideal! These can be bought from sign-supply companies up to fairly large sizes. Because seams are awkward, it is ideal to get them in one-piece – and thick enough so you don’t cut through them. 6mm/0.25″ is great, thinner is ok but will get sliced more easily.
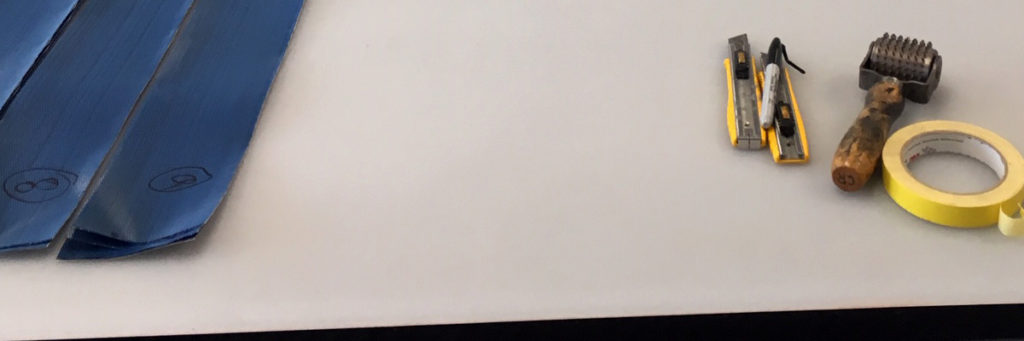
For wet-layup when you pre-wet material between plastic, a clean cutting mat is great. You’ll need to come back and wipe it down with a solvent when you’re done to get the resin off of it. This beats plywood or cardboard because it can be razor-knifed into for cutting out plies and won’t leave chunks of itself along the edges of your tapes.
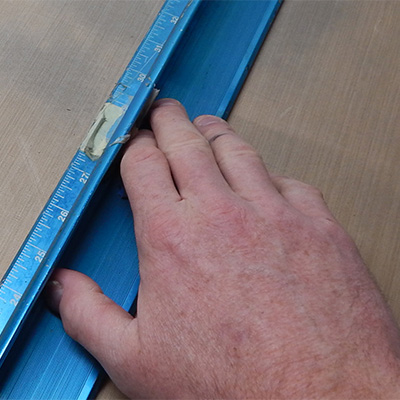
You will also want a safety ruler if you do a lot of razor-knife work. These are a good investment because fingers are all too easy to slice off – and that is always worth avoiding! I like to cover the rubber bottom of my rulers with adhesive teflon or packing tape to make it easier to slide around. It also keeps resin from sticking to the rubber pad and ruining it. This is especially handy when dealing with pre-pregs – especially those with backer on only one side.
Scissors
You need scissors or shears to cut material. The cheap ones with the plastic handles work ok – and if you’re just starting out they are fine.
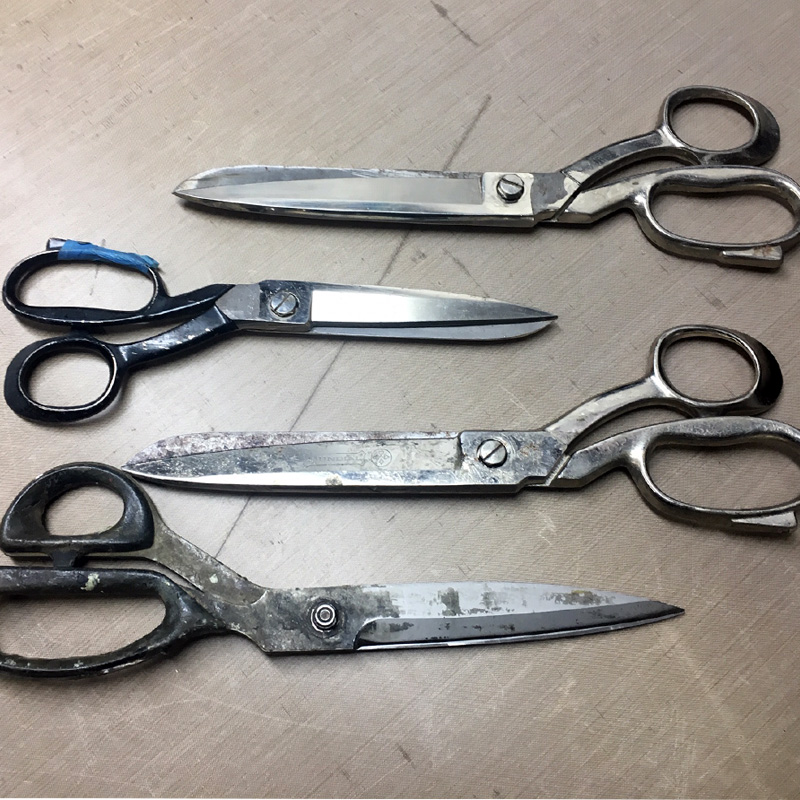
My kit includes (top to bottom):
- Wiss shears
- Kevlar scissors with abrasive edge
- Mondial shears
- Kai Scissors 12″
It is nice to have smaller scissors too, especially for cutting detailed pieces.
When doing wet-layup, I like to have a wet pair of shears and a dry pair – but good luck keeping the “dry” ones ungooped!
You might notice that I used the words “scissors” and “shears” interchangeably… my understanding is that scissors are small and delicate where shears are big and heavy duty!
Laminating
Along with those scissors and the razor knife, when you layup composite parts with resins – polyester, epoxy, whatever thermoset you are using you’re going to need some more tools to roll out the laminate and maybe press material into corners. Rollers of all kind, squeegees… I always like to have Sharpie markers for marking – there are a few basic things you’ll just need to have if you want things to come out well.
Resin Mixing
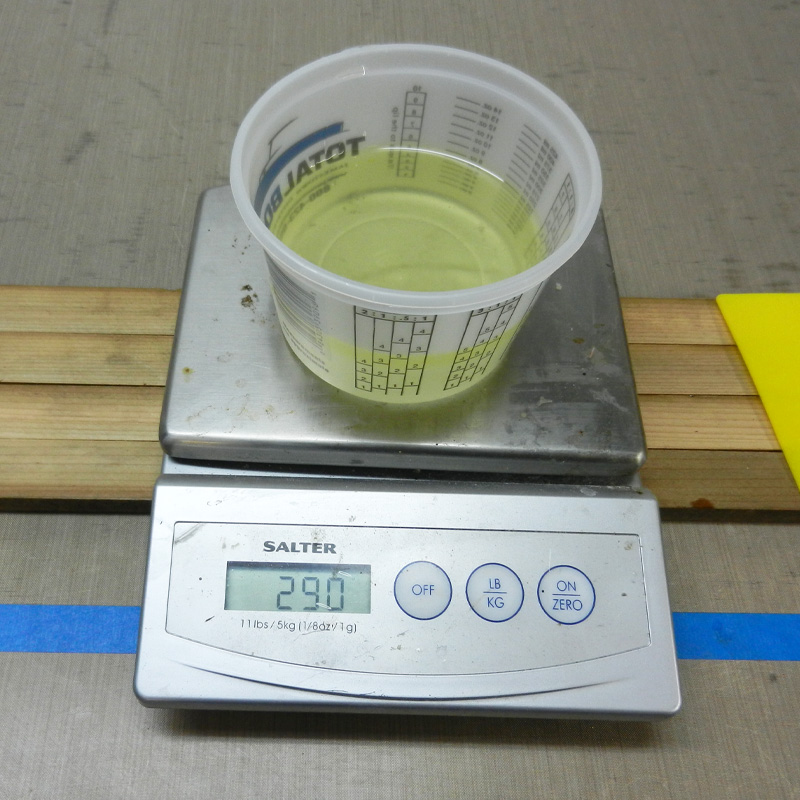
A scale is very useful for measuring resin by weight – which is the most reliable and precise way to do it. This small digital cooking scale is accurate to 1g and is very handy for weighing all kinds of things.
For larger volumes of material, a bigger scale is good – and at a certain point a large pallet scale right on the floor is great to have.
Make sure to protect your scale from spills and generally keep it clean – cleaner than mine! I put clear tape over the display and buttons and it can be pulled off and replaced when it gets sticky.
More on mixing resin in this article: Mixing Resin
Adhesive Dispensing
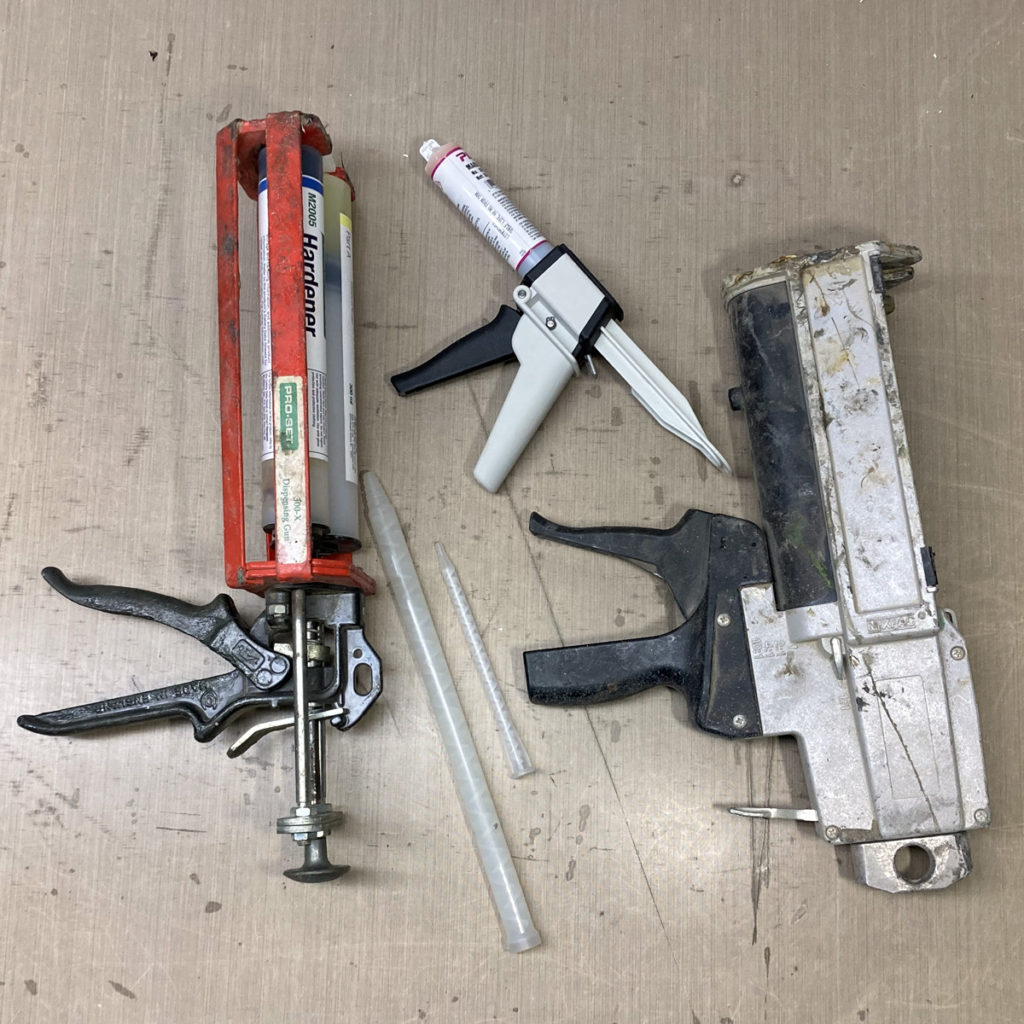
Lots of adhesives come in two-part tubes that allow you to dispense only what you need at the right mix ratio. You can use a static mixer for larger volumes and it comes out perfectly mixed. For small quantities, they can be mixed by hand with a stir stick on a plastic tray – ideally one that will be reusable.
Different adhesive manufactures will use different mix ratios (tube diameters) and standard tube types. For example, in my kit the 300X on the left works with Proset cartridges, and the Mixpac DM 400 on the right works with Gurit Spabond and others. The little one in the middle is a standard 50mL Loctite one that dispenses all kinds of materials. If your hands get tired you can get these in electric or pneumatic – but they’re expensive.
The little tubes at the bottom are two sizes of static mixers. These fold the resin streams over and over, splitting and mixing until the resin is complete mixed. These are disposable, but you can get re-usable ones for larger equipment, but cleaning them is not always easy.
Wet-out Tools
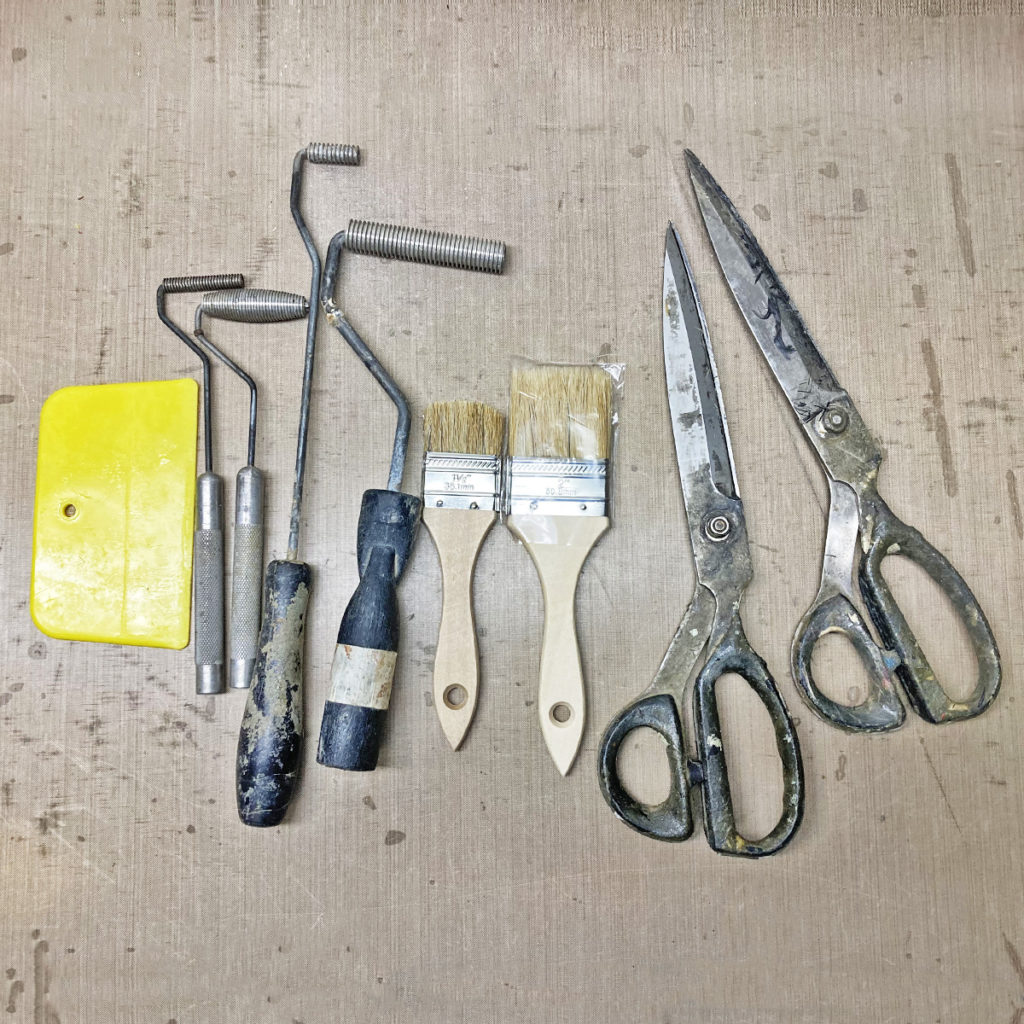
Wet layup tools don’t have to be fancy, and if you’re like me they won’t stay clean for long. First off, brushes and squeegees are key for actually wetting out the fiber with resin. For larger parts a full-size paint roller can really help speed things up. Brushes with the bristles trimmed down are more effective for moving resin around and priming surfaces with a minimum of resin pooling. Your brush gets more like a squeegee the more you trim down the bristles!
Wet-out rollers (or “laminating rollers” or “bubble-poppers”) come in all sizes and many shapes. For detailed wet layup, small ones are great. Ones with contoured rollers are good for curved surfaces. You’ll want to take them apart and clean them with solvent after every use because once they get gummed up they’ll never be the same.
And back to scissors (shears) again. I am a big fan of having a clean pair and a “wet” pair when doing wet layup. The wet pair is for cutting already-wet-out fiber and making adjustment on the job. The dry pair is for dry material and so that when you get to peel ply and bag consumables you won’t get resin all over everything when cutting and fitting material. I don’t show any here but small scissors are very handy to have too for detail work. Keep them sharp and clean – unlike mine! These need a good Scotchbrite grinding and a fresh sharpening to be back in fighting form.
Pre-preg Laminating Tools
Laminating with prepress is a bit different than the other processes. It’s nice and clean, but there are lots of fussy things to consider.
Here’s an article about: Laminating with Pre-pregs
Below are some of the common tools you’ll need. You should keep yours cleaner than I keep mine!
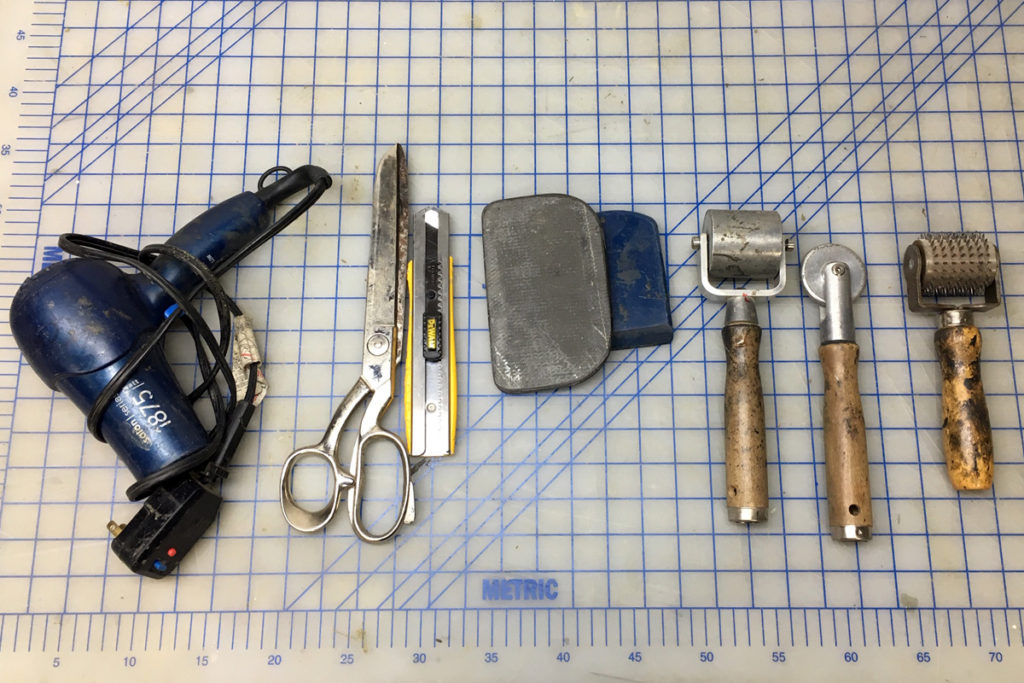
The heat gun or hair dryer (hair dryers are less aggressive and are my preference) is for wearing prepreg material to help it stick together. This is sometimes helpful as it makes the otherwise-tacky resin more fluid and slippery.
The two push sticks or “dibbers” in the middle are for pushing prepreg into corners and radii. One is carbon, the other is high density plastic. Custom shapes help with specific parts. You want to keep them clean if they are run contact with prepreg because contamination is bad news.
The rollers on the right are for pressing sealant tapes and gently pressing prepreg into corners – especially through a debulking bag. The spiky roller on the far right is for poking tiny holes through layers of prepreg to help vent air out in the debulking process. Be careful not to roll your finger!
Infusion Tools
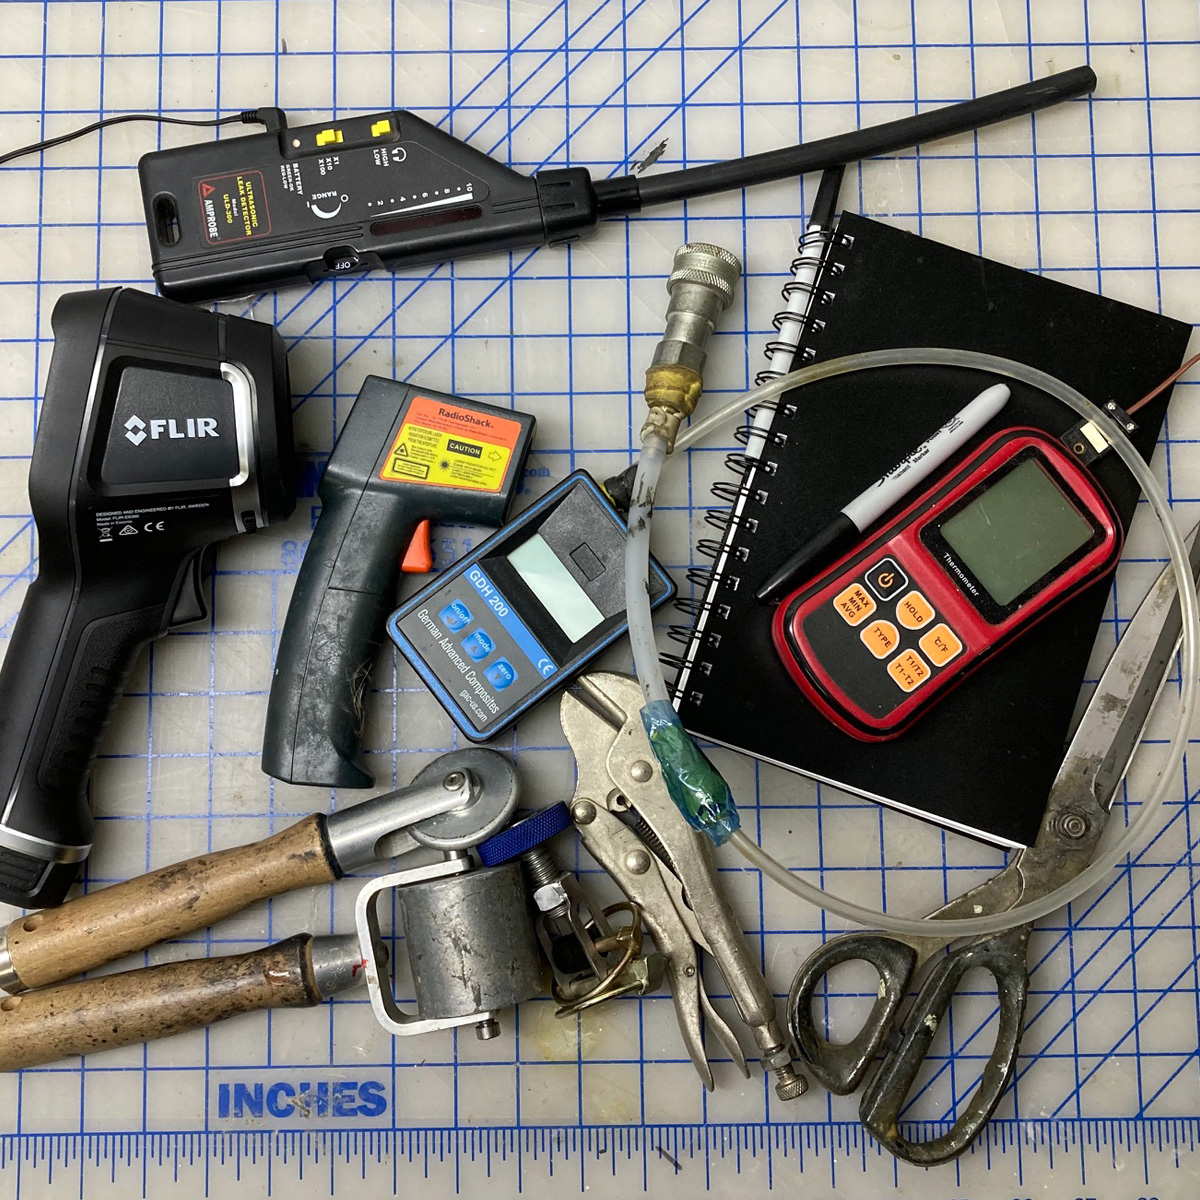
Vacuum infusion is another one of those processes that will require some additions to your toolkit. You don’t need all this stuff to do good infusions – but most of these things will be present in the professional toolkit. Pretty much everything here is related to the mechanics of infusion – or has to do with temperature or vacuum monitoring.
For more on vacuum infusion: Introduction to Vacuum Infusion
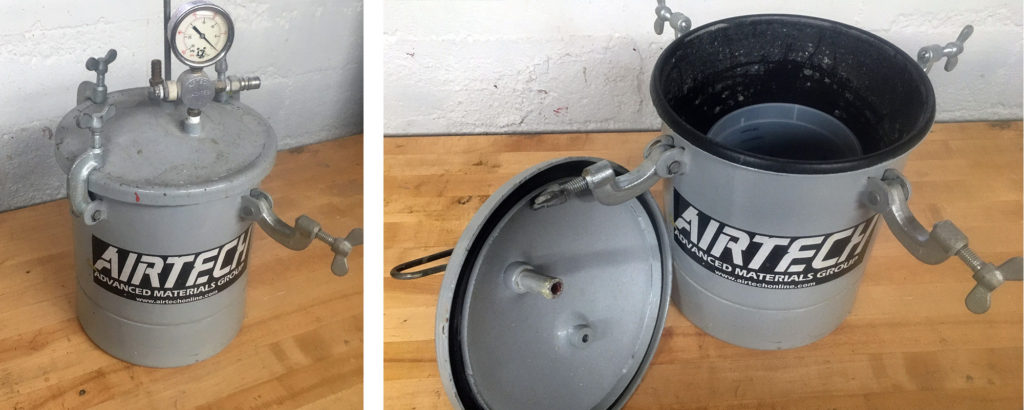
And down at the bottom we have a catch pot – which serves to protect the vacuum system from any overflow resin. The vacuum outlet lines from the bag go into the catch pot through a barbed fitting or a hole sealed with tacky-tape. The vacuum is connected separately so that any resin ends up in the pot (ideally in a disposable bucket) and not in your vacuum pump!
Vacuum Bagging Tools
Hoses, couplers and gauges… and other stuff.
This is a big one and has its own article (and video!) to go over the details and options: Vacuum Stuff: Hoses, Fittings and Accessories
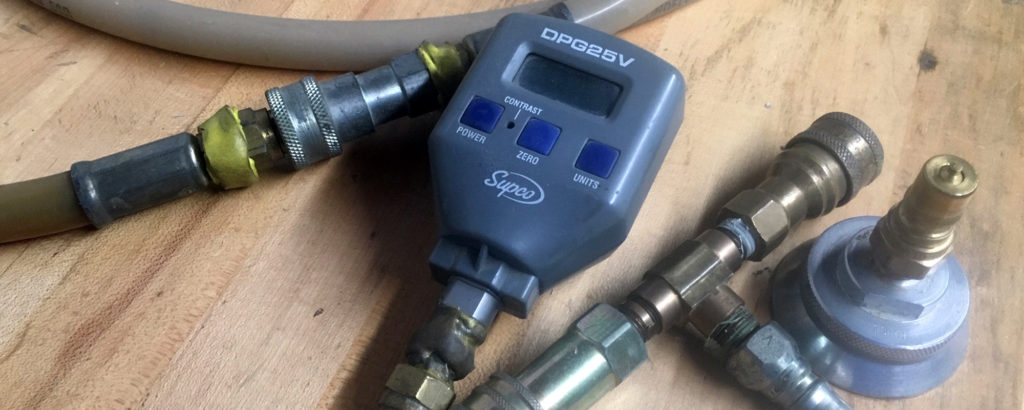
The key with vacuum stuff is to make sure you are using things that match your process. The kit will look very different for bagged wet layup, infusion or prepregs!
Vacuum Pumps
And if you still need a vacuum pump: How to Choose a Vacuum Pump for Composites
Trimming and Grinding
These are some of my go-to grinding, sanding, trimming and routing tools. This is by no means an exhaustive list – just a bunch of stuff I have use a lot over the years – things you might not know about unless you’ve been in the trade – and wierdo things that may just appeal to me! Let me know if you think something should be here and I’ll look into it. For now this is pretty much just a toolbox dump.
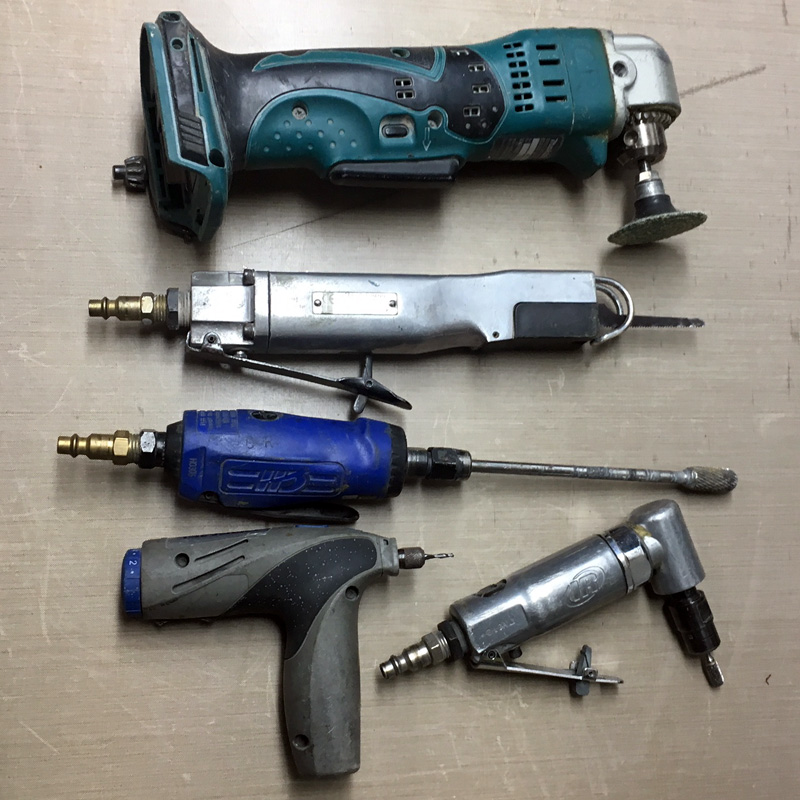
From top: Makita right-angle cordless drill with Rotaloc grinding arbor, pneumatic reciprocating saw, die grinder with long burr, Dremel cordless rotary tool (discontinued I think), and right-angle die grinder- which also works great with the Rotaloc arbor – but much more aggressive than the drill because of higher RPM.
Diamond and Carbide Grit Cutters
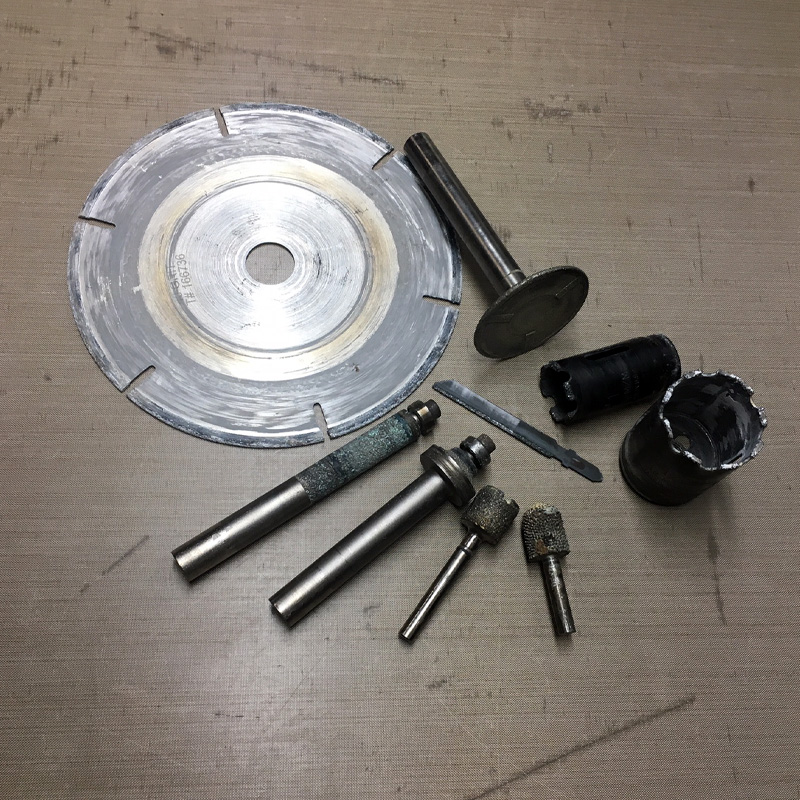
When it comes to cutting, grinding and machining composites, bonded-grit tools are excellent. These can be made from either carbide or diamond grit and last a very long time if not abused (much). These tools in the picture are a mix of router cutters, burrs, hole-saws and blades.
The diamond saw-blade with the gullet rim is not a cheap tool, but for cutting heavy composite panels with a table-saw or circular saw it does an amazing job. The mounted wheel is similar, but the blade is fit in a router and used to offset-trim. This can be an ideal way of trimming up flanges on molded parts, because the part becomes the fence for running the router base.
Carbide and diamond hole-saws are great for cutting composites and will also much longer than standard steel or even carbide toothed hole-saws. The finished hole will be nicer too.
With all these, it is important to keep them from overheating. Too much aggressive cutting can heat the composite and cause de-lamination. Foam cores also tend to melt and clog the grit, so it is best to avoid.
Sanding
Sanding is one of the most common and least-enjoyed parts of making composite projects. It comes up everywhere, from pattern finishing to core fitting, part trimming and secondary bonding – and then there’s the primer and paint process!
Here are some of my go-to sanding and heavy fairing blocks and tools.
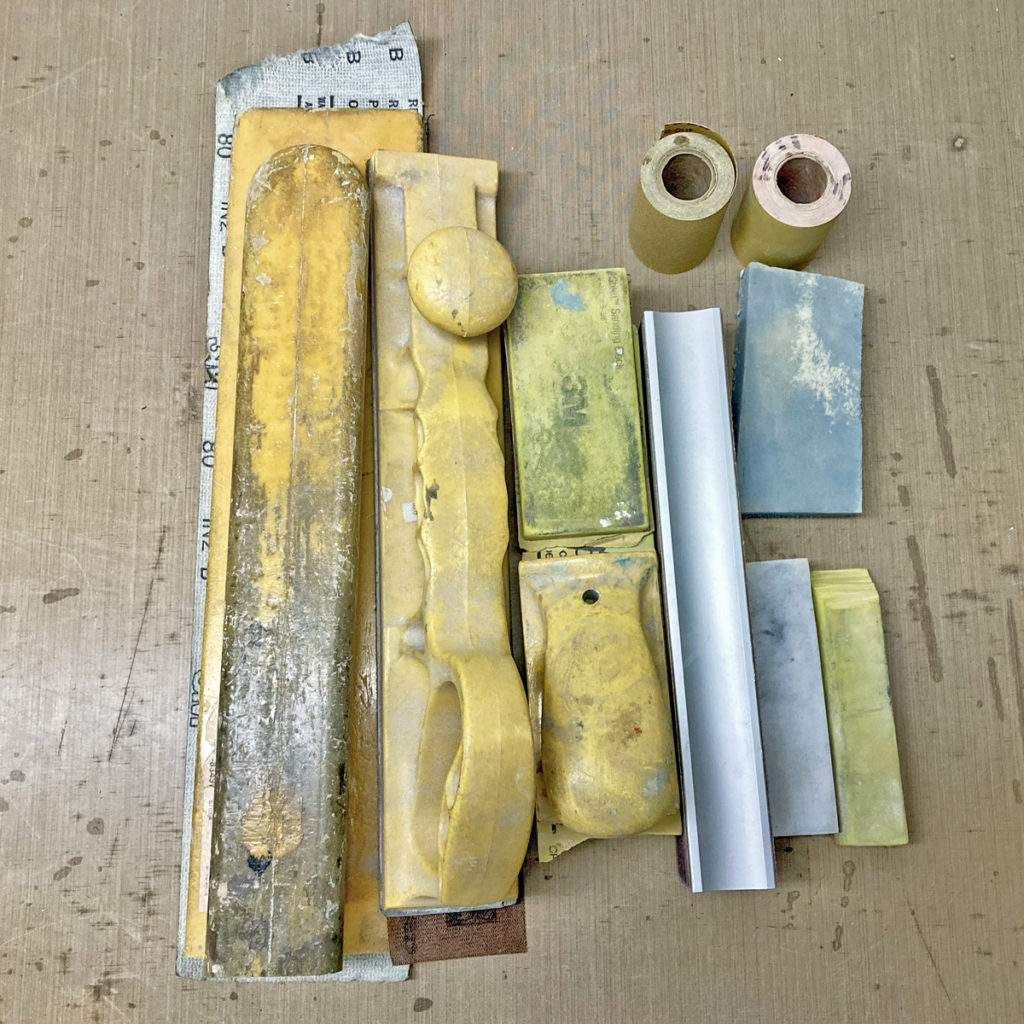
For very rough work, there’s nothing like 36 grit paper on a long-board (or half of one) for shaping and carving. It leaves huge scratches, but for rough shaping it can’t be beat. The aluminum one is a Perma-Grit sanding block that has two sizes of carbide grit bonded to it – a quick and handy tool for rough shaping and cleaning up trimmed parts.
I have been using 3M Stick-it paper for years and don’t know what I’d do without it. You can put it on a hard-faced block and you get that hard surface keeping the sandpaper flat and making fairing much more effective. The small blocks are a mix of hard and soft foam. Some are 3M-made blocks which are excellent but expensive, and some are made of soft EVA rubber foam. For fine sanding or wet sanding, EVA foam of varying hardnesses and densities makes excellent soft blocks, because it has a somewhat hard surface and a uniform bendiness.
The large yellow sanding board with the knob handle is set up for hook-and-loop paper, but I prefer the sticky paper because there isn’t the “give” of the hook-and-loop.As you get to fiber grits and the job moved from shaping to smoothing (which is I guess just shaping on a smaller scale) hook-and-loop starts to make more sense.
Of course it is nice sometimes to use power sanders and grinders. An assortment of rotary and dual-action sanders are almost always found in composites shops. I’ll round up a bunch when I get a chance…