Please note: This is still in progress! I am working on it…
The details are where the fun is! This article is about what to do when you come to an edge, a hole or a place where parts need to get bonded together. Because you control the fiber orientation, not just the geometry, there are lots of great ways to manage loads and detail parts to make assembly easier, lighter or more specific. This is hardly a complete catalog of composites details, but should help you if you are just starting out – or shopping for ideas.
Simple Edges
You have to do something at the edge of your panels to protect the core – if you’re using core. No core – well maybe no problem. Depending on the service situation and the potential for damage, it might be good to flange uncored parts too – or at least, roll the edge.
Bevel Core to Single-skin Edge
The simplest thing to do is to stop the core before the edge, so a solid laminate is exposed at the cut. This is best done by tapering the core at anything from a 1:1 to 4:1 bevel. The 2:1 bevel shown here is pretty typical. It’s also good to have at least two core thicknesses of contact between the skins after the core stops.
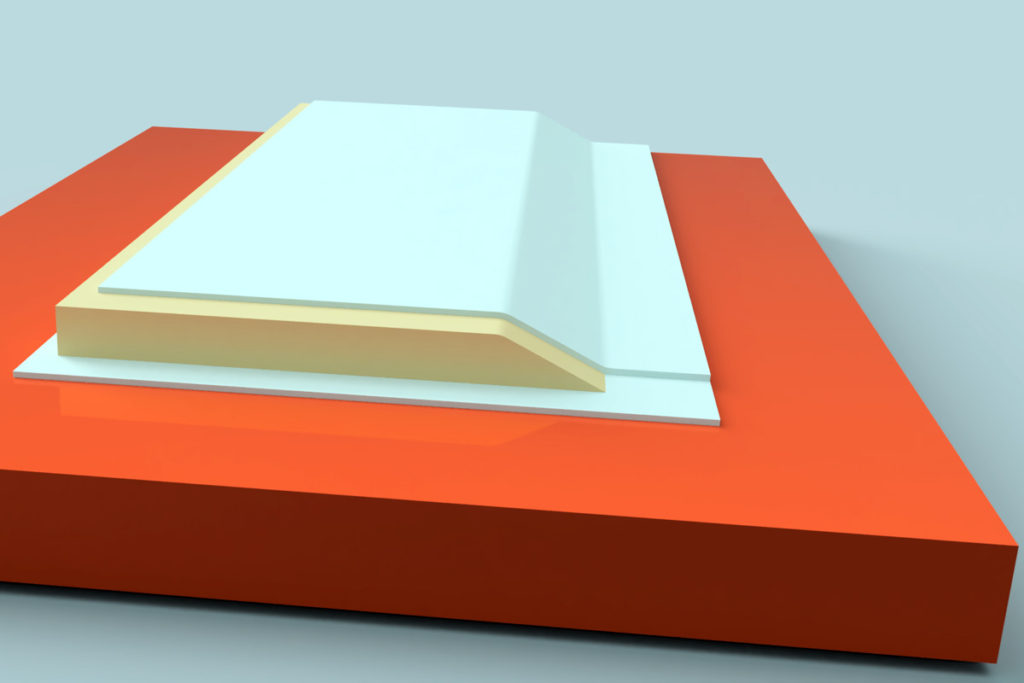
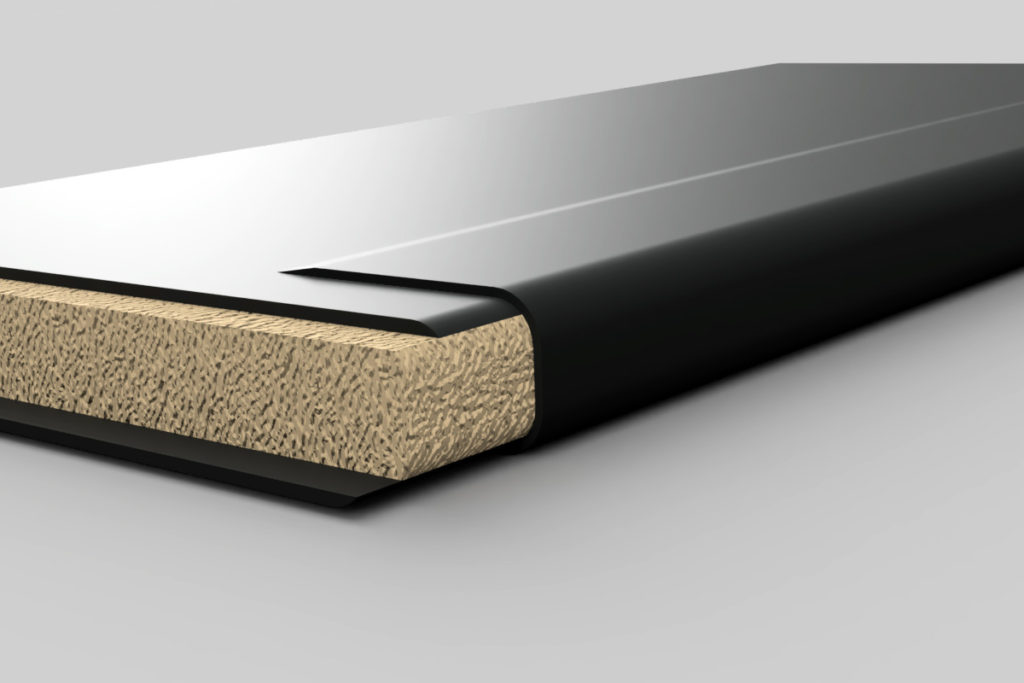
Tooled Flange with Core Taper

This is an elegant way to end panels – and one that can be easy to do if your tooling geometry allows for it. Similar to the beveled core above, this one turns that skin-to-skin zone at the edge up into a flange. The flange further stiffens the edge and protects the exposed laminate where it will be trimmed.
Because the core is tapered and stopped before the corner, this can easily be done in “one-shot” layups with almost any common layup method.
Another benefit is the solid laminate in the way of the corner which is more tolerant of impact and easier to repair than many other options.
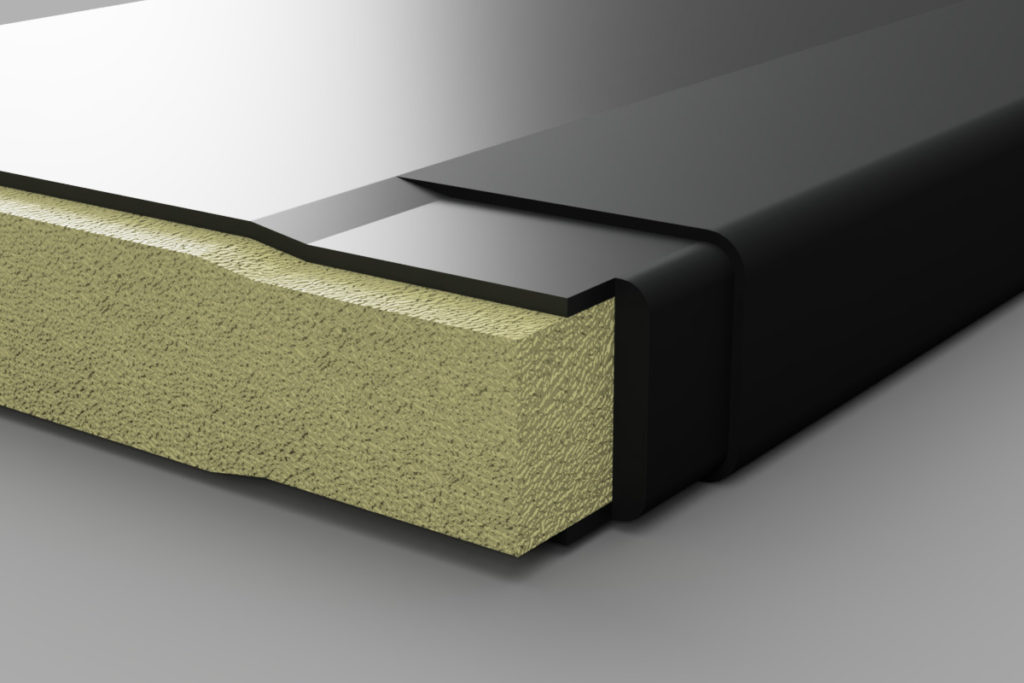
Tooled Flange with Core into Corner
Another option when you’re tooling flanges is to but the core right into the corner. The panel edge is stiffer and better supported, but there is less area for the skins to be tied together because the only meet in the upturned part of the flange. This one is more trouble to fabricated because the core needs to be fit very well to the corners for single-shot layup. With infusion or pre-preg this can be a good option. It is often used where a capping will be included – see below for details.
Laminated Closeout at Edge
The panel is laminated and trimmed with exposed core and a U-shaped “close-out” is laminated over the exposed core lapping onto the skins of the panel. This serves to protect the exposed core while tying the skins together and allowing for a neat finishable surface.
Typically this laminate is all or almost all +/-45 degree fiber – plies of stitched biaxial reinforcement or woven material cut on the bias so the fibers are +/-45 to the along-the-panel axis.
This is a labor-intensive option that is not well suited to production but can be excellent for one-off parts or those made up from pre-laminated panels. See also the capped version of this in the next section.
Edges with Structural Capping
The edges of panels can sometimes need unidirectional cappings to meet the structural requirements. There are easy ways to do this and harder ones! Your engineer will probably specify the width and thickness of cappings, and likely the precise way that they should be constructed. This added step and take the simple edge detail and make it a lot of work. Many of these details require multiple cure cycles to get right.
Tooled Flange with Capping
Here is a version of the tooled flange with the addition of a unidirectional capping sandwiched between the extension of the inner and outer skins of the panel. This would be a difficult thing to reliably build in one curing operation. There are a few options that would work well:
First, the capping could be pre-cured from unidirectional material (wet, infused or prepreg – potentially pultruded flat stock) and combined with a wet-laid, prepreg or infused panel layup in one operation. This would have to be carefully done but might be a good option of the capping flange is straight.
Alternatively the capping could be laminated with the bottom skin in one curing operation, with the core and second skin laminated separately in a combined or in two individual curing operations.
Capped Panel Edge
Complicated Capping with Foam Wedges

Sometimes (ok, rarely) you need the ultimate capping – for a highly loaded stringer or bulkhead. Things can get out of hand! This is an example of a heavy capping on a cored panel with several extra details.
Holes
Sometimes you have to have holes. The problem with composites is that holes aren’t as simple as just getting out the drill and going to town – but sometimes its close!
Single Skin
This is the simplest kind of hole you can make in a composite panel. You just drill or machine out what you don’t want. This is only a good idea with single-skin (not cored) parts. If you have a cored part, you can just drop out the core in the areas you plan to drill – just make sure you have tapers and enough skin-to-skin area for the required loads. Engineering around core ramps can get weird.
Core Blocking or Inserts
It is sometimes easiest to plan for holes in cored parts by replacing core with solid inserts made of composite or metal.
Flanged Holes

Sometimes you are going to design tooling to make holes in panels from the start. It’s like a hole-shaped version of the flanged edges discussed above. This is an elegant way to manage the details, and it allows for a flanged edge without exposed core. This flange can contain a unidirectional capping if you’re engineering suggests this is necessary.
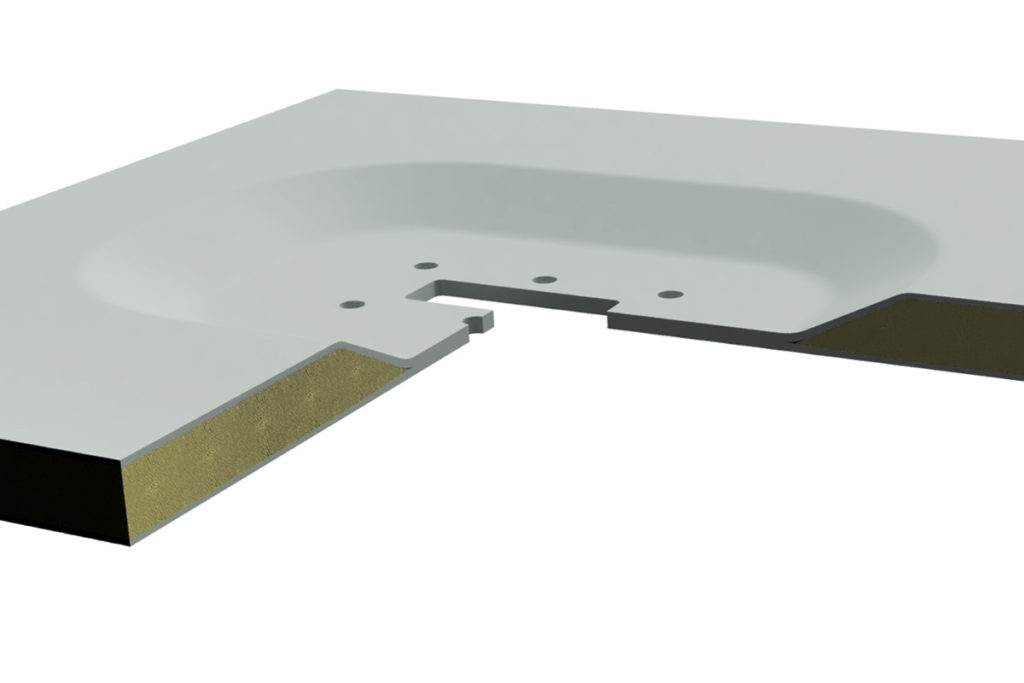
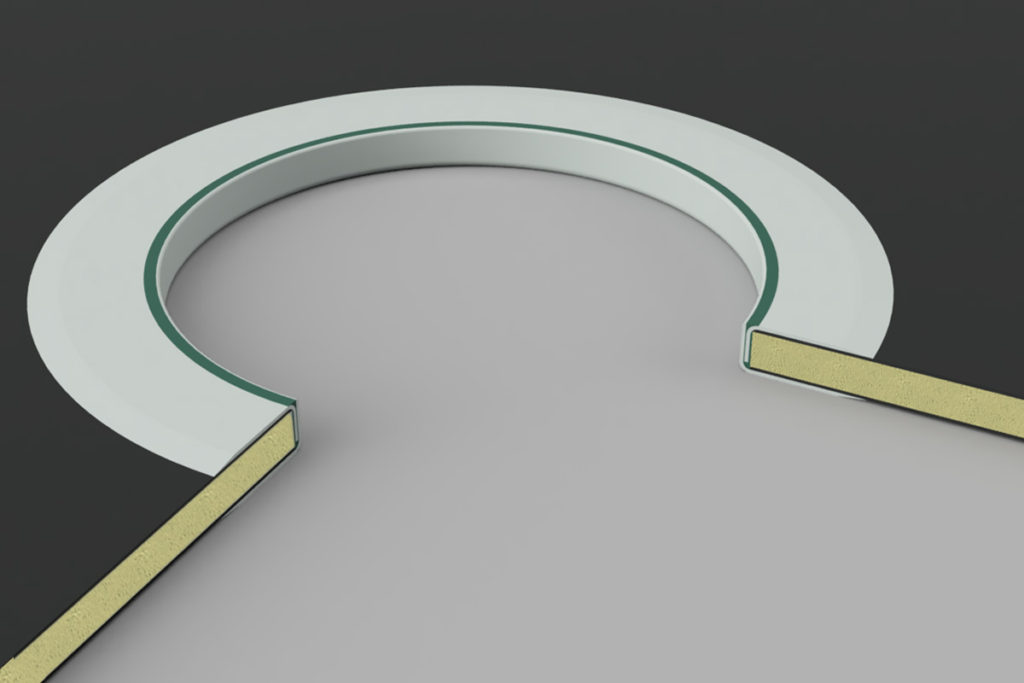
Interlocking Pre-molded Hole Closeout
This is one that makes sense if you are putting smaller holes though cored panels. It’s not the simplest but it can be installed easily as most of the work is in pre-molding the two interlocking pieces.
You start off by making two separate hole-shaped up-stand tools to form the molded rings. The precision of the tooling and layup will determine the size of the adhesive bond-line between the two parts.
Molded parts are pre-trimmed to the right dimensions and then glued together through a slightly-over-sized hole. Clamps or a threaded installation bolt with large washers can be great for this.
Bonded Joints
You can always choose to treat you composite like metal and use mechanical fasteners. There’s nothing wrong with this and it is very reliable.
Scarfed or Spliced Butt Joint
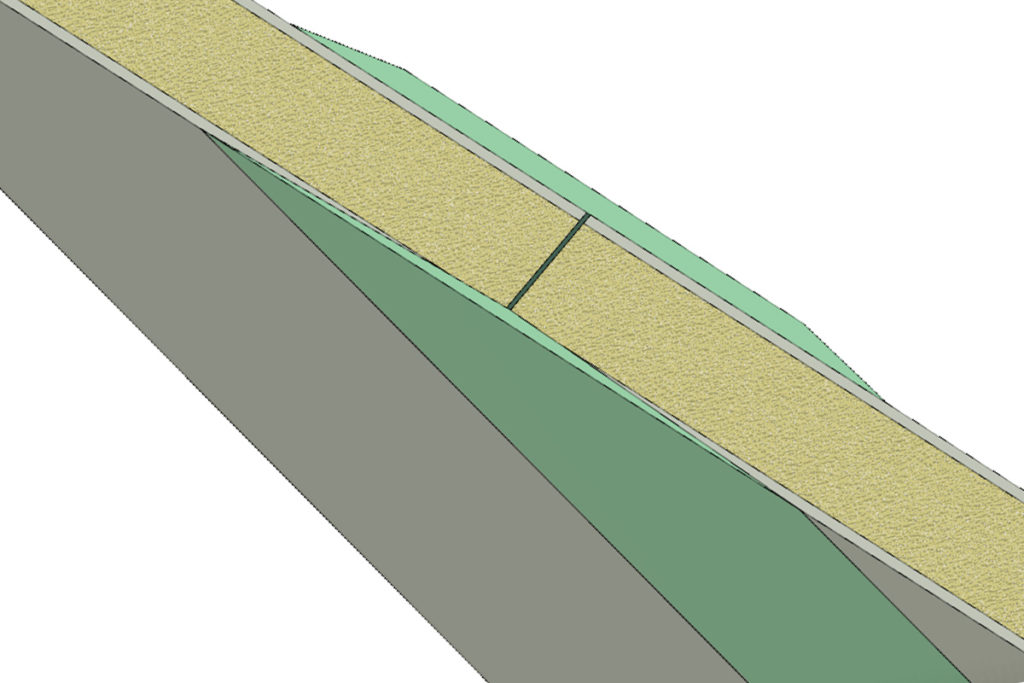
This shows two options for joining two cored panels. They’d work for solid laminate as well, but the scarf could go all the way through or not – depending on the butt block.
Here we’re imagining a flush connection on the front face, with a long ground-in scarf that is secondary bonded with plies of reinforcement to match the laminate of the panels. Scarf angles of 20:1 up to 100:1 are common with composite scarfs – angle depending on material properties and fiber orientations in the panels. You can laminate this type of thing slightly over-thickness and grind flush, or grind away a bit of the core so the laminate lays low in the middle where you can use a fairing compound to flatten out the surface.
The panels are spliced on the back with a “butt block” or “splice piece” or “doubler” to connect them – which is only ok if you don’t mind all that extra material. Note the tapered ends of the splice piece. This helps “soften” the hard drop-off in panel stiffness at the end of the block. In theory these tapers could be much more pronounced – almost like the thickness distribution of the “scarf” piece on the opposite side. This is a great option for blind or restricted access connection of panels – or of one side like this.
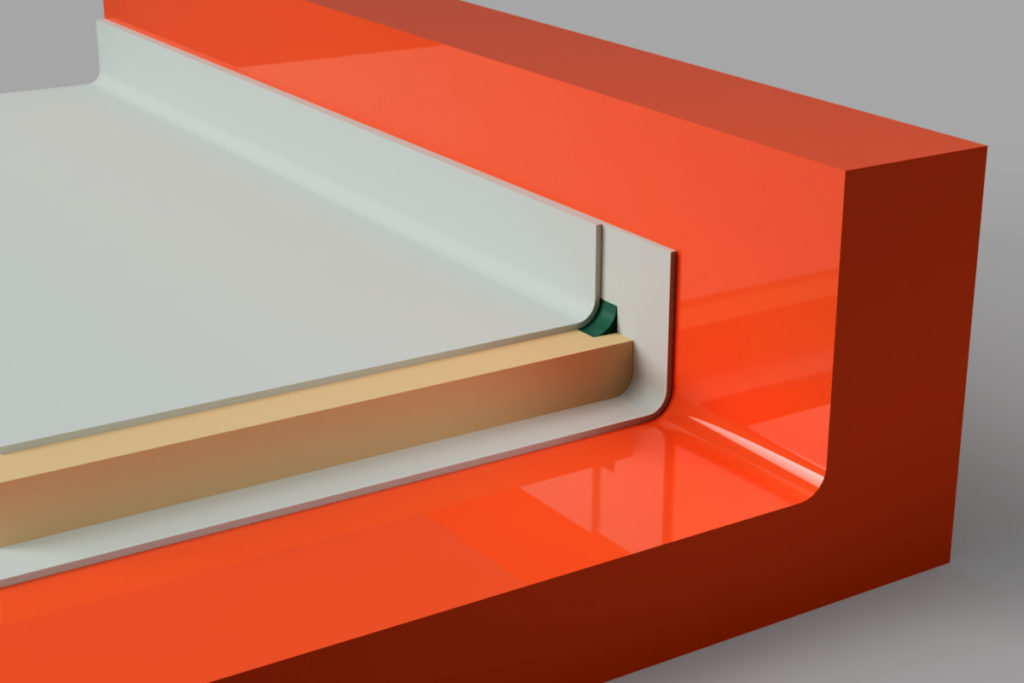
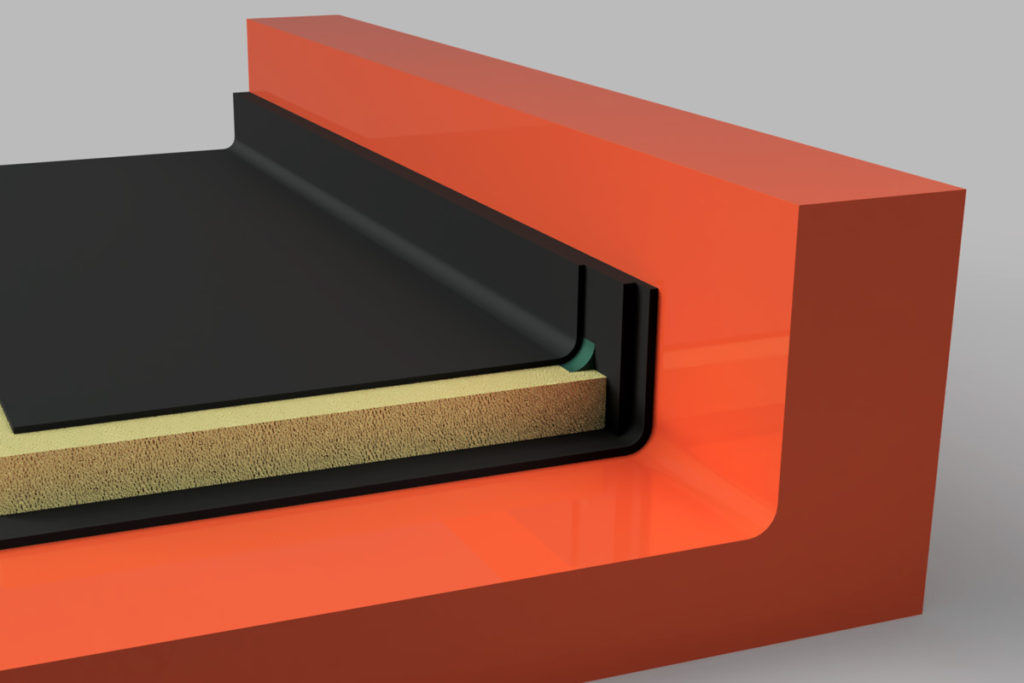
Flanged Connection
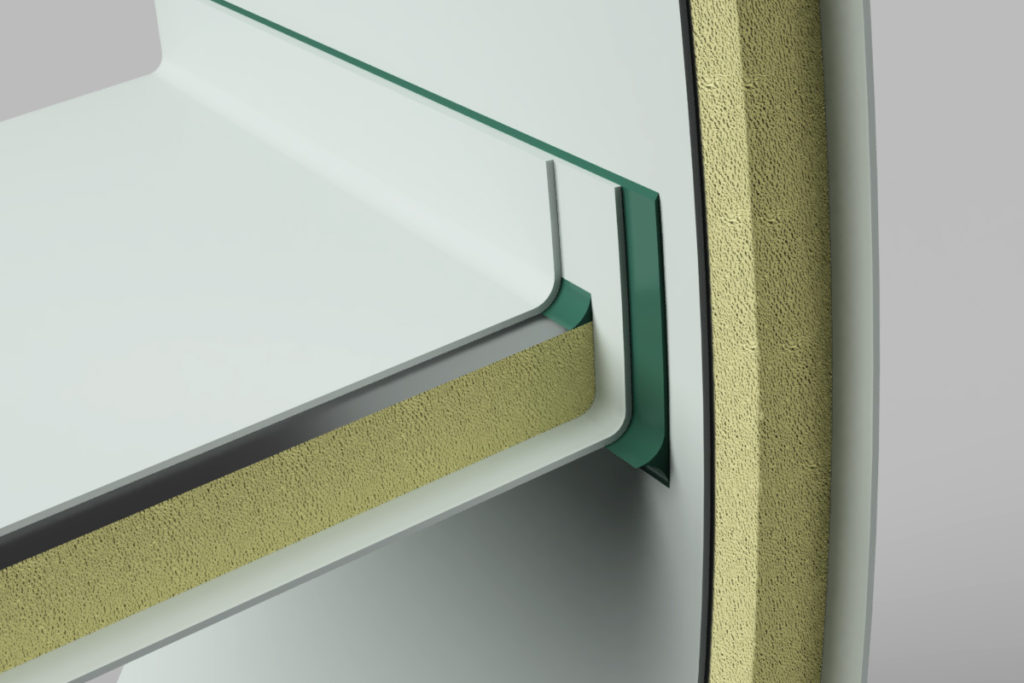
Here a panel is bonded to another by way of a flange. The flange is constructed as described above in the “flange” section. In this image, the parts have been cut back to show all the individual elements of each cored panel.
The connection is made by way of the thicker green “adhesive” between the flange and the closer skin of the cored vertical panel. Flanges are an elegant way of assembling structure that can be molded to final shape – with the flanges built in. Tooling can be made to accommodate complicated flange shapes and rolling bevels.
Taped / Tabbed Joint
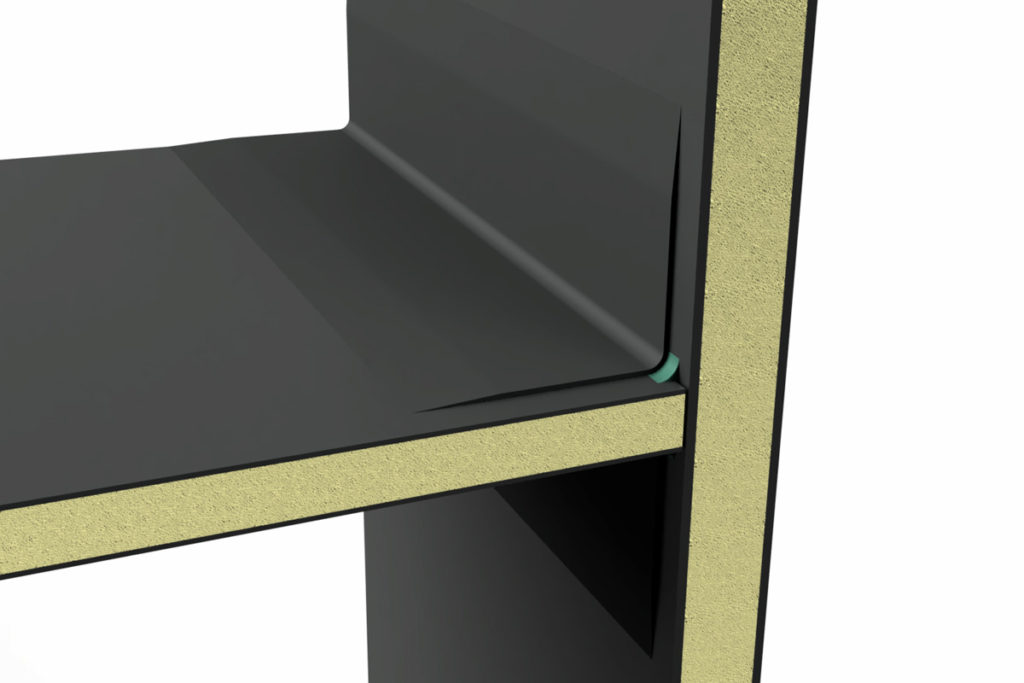
Panels are filleted together with a thickened adhesive and then laminated together with plies of reinforcement. This is typically called “taping” or “tabbing” joints and is a strong, tough and effective way to join panels. It is usually done open-molded or vacuum bagged with a wet layup.
Fasteners
Compression Tubes
Tapped Holes
Threaded Inserts
Surface Mount Fasteners
Rotaloc-style bond-on fasteners avoid the hole at all!